
In our master bedroom, there is a personalized shelf mounted on the wall that I was gifted by my thoughtful and creative aunt when I was a young child. The shelf is simple, a stained wooden creation with my name and flowers etched into the back and sides, a heart cut out of the center, and three shaker pegs for hanging coats or other personal items. I love special treasures like this and Doug and I decided to take a stab at recreating the shelf for the nursery. I’m so happy with how it came out and can’t wait to make a few more!
Tools and Materials:
One 1” x 6” solid wood board, need at least 4’ long
Pencil and paper
Miter saw
Scroll saw
Circular saw with straight edges to guide
Router with flush trim bit
Drill press or drill with drill bit
8 pocket hole screws
3 Shaker pegs
2 sawtooth hangers
Sandpaper, various grades (we used 120 up to 320)
Step One: Design and Trace
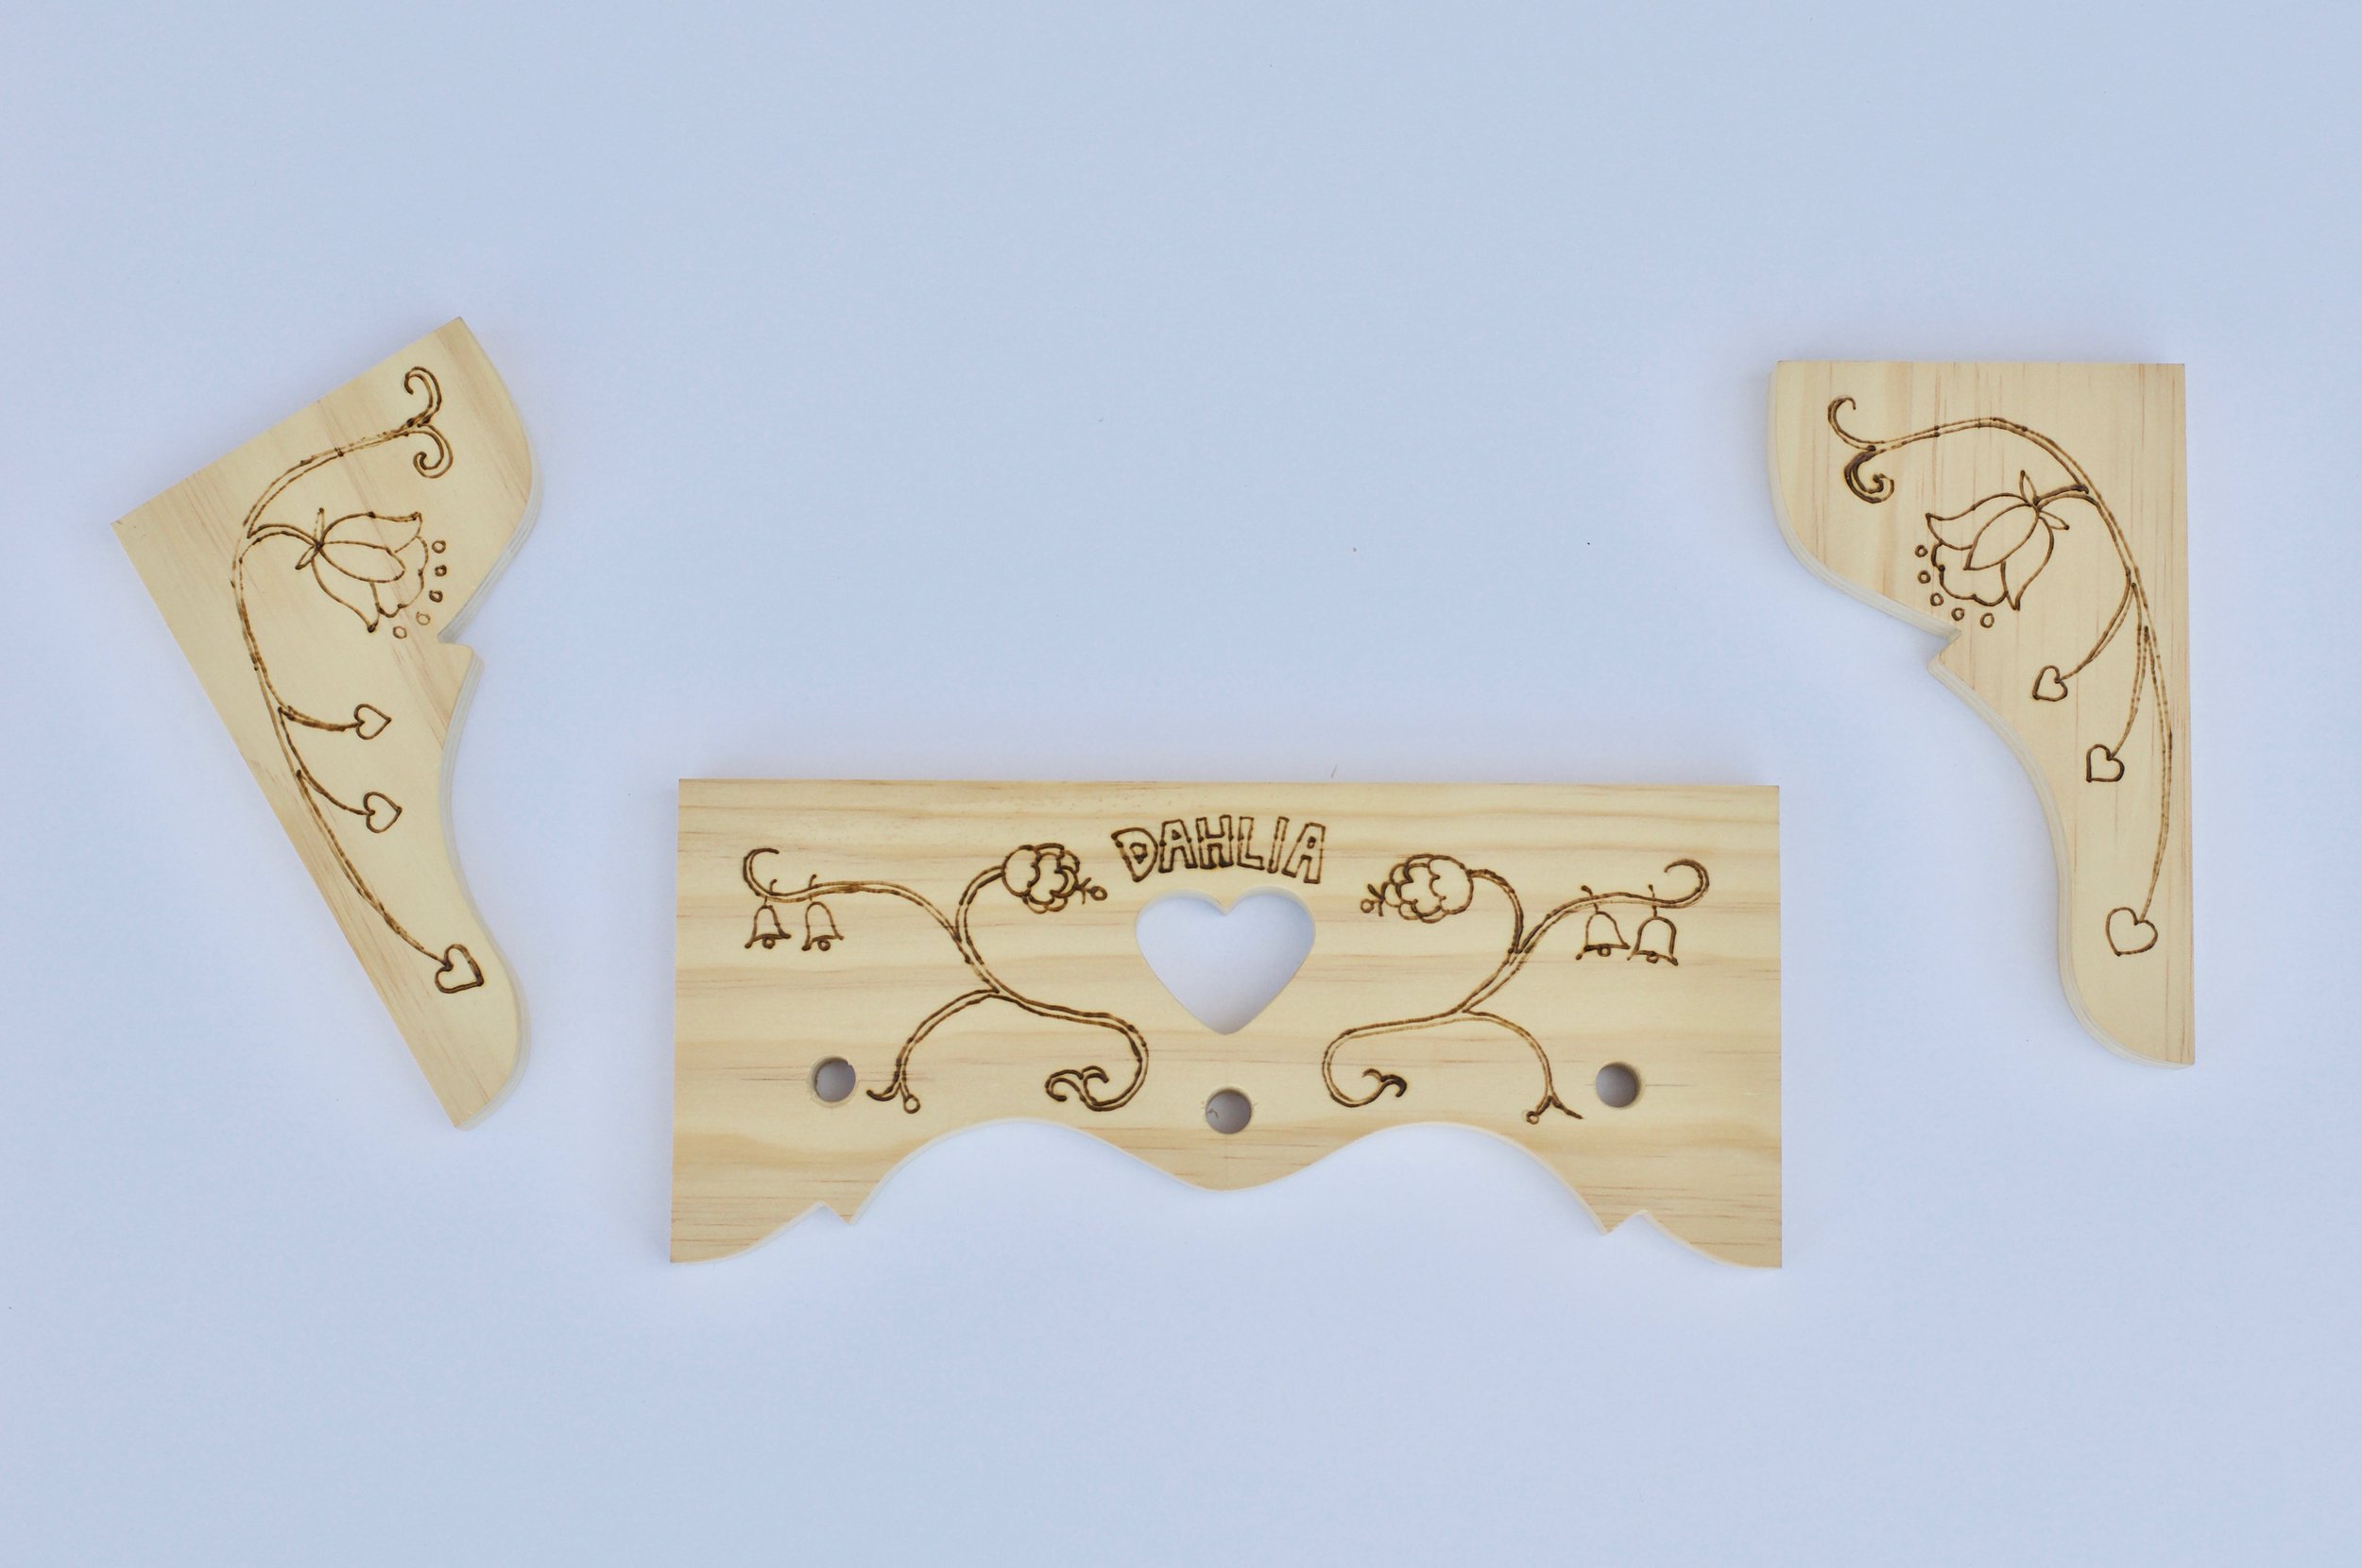
First, we created a stencil for the wood cutouts, including top, back, and one side piece, which was used to create a template for the two final side pieces. The back is the most involved piece, including decorative edging and a heart that Doug eventually cut out with a scroll saw. After we created the stencils, Doug traced the designs onto the wood we purchased and took the next big step: cutting the wood.

Step Two: Cut the Wood
First, Doug used the side piece stencil to create a template for the sides; this helped ensure the two pieces would be identical. He used a miter saw to cut roughly along the stenciled lines and then used a scroll saw for making closer, smoother final cuts. Once the template was made, he used it to cut the two side pieces with his router fitted with the flush trim bit. A scroll saw was used to cut out the steeper angle on the side pieces.
Using a circular saw and straight edges for guides, Doug cut out the top (a simple rectangle, 4” wide by 14 ¼“ long). He used a scroll saw to cut the back piece. He used a drill bit to put a hole to prep the heart he traced on the back piece and then used his scroll saw to cut out the heart design. A drill press created the three holes in the back piece for the shaker pegs, which were sanded down a bit to create a perfect, snug fit into the holes.
Step Three: Sand the Wood
Doug used several different grades of sandpaper to even out the wood after cutting and to prep it for decoration. He used 150-grit paper to sand all the edges he had cut to smooth them out and remove any saw marks, and to even out the curves on the back pieces to make them more symmetrical. He then prepped the wood for finishing, beginning with a 120-grit and working his way up to a very fine grade, 320-grit.
Step Four: Decorate the Wood
You could skip this step and go straight to finishing the wood if you’re looking for a more minimalistic design, or even leave it unfinished, but since we were using the shelf in our bedroom as inspiration, I decided to sketch our daughter’s name along with some floral designs onto the wood. I free-handed the design using some basic margin marks so that the placement would be the same but the design would be more natural and not so perfect.
Once the design was on the wood, I went over it with a wood burning pen and colored it in with paint. I used acrylic paint but I think next time will try watercolor. I like how it came out, but the acrylic gave it a really bright, opaque coloring, and I would like to see how it would look with a lighter, more “stained” color, which would more closely match the one in our bedroom.
Step Five: Piece it Together
After I had decorated the sides and back, Doug assembled the shelf using pocket holes and pocket hole screws. All the screws were put in through the back piece. Two went into each side and four went into the top shelf (two at each end), for a total of eight screws. He used wood glue to secure the pegs in the holes.

Step Six: Finish the Shelf
Once the wood is decorated to your liking, finish it to help protect the shelf and your design. I used a polyurethane spray to help get into all the nooks and crannies. I recommend giving yourself a few days to do this and to use very light coats of spray. Spraying the heart was especially difficult, because the finish would pool up around the edges of the heart. Wait until each coat is thoroughly dried, and try spraying the finish at different angles to hit all the crevices and corners.
Once the shelf was thoroughly dried, Doug nailed on two sawtooth hangers so that we could mount the shelf in the nursery. Then, I got to decorating the shelf with all the little trinkets I had been saving for our baby girl.
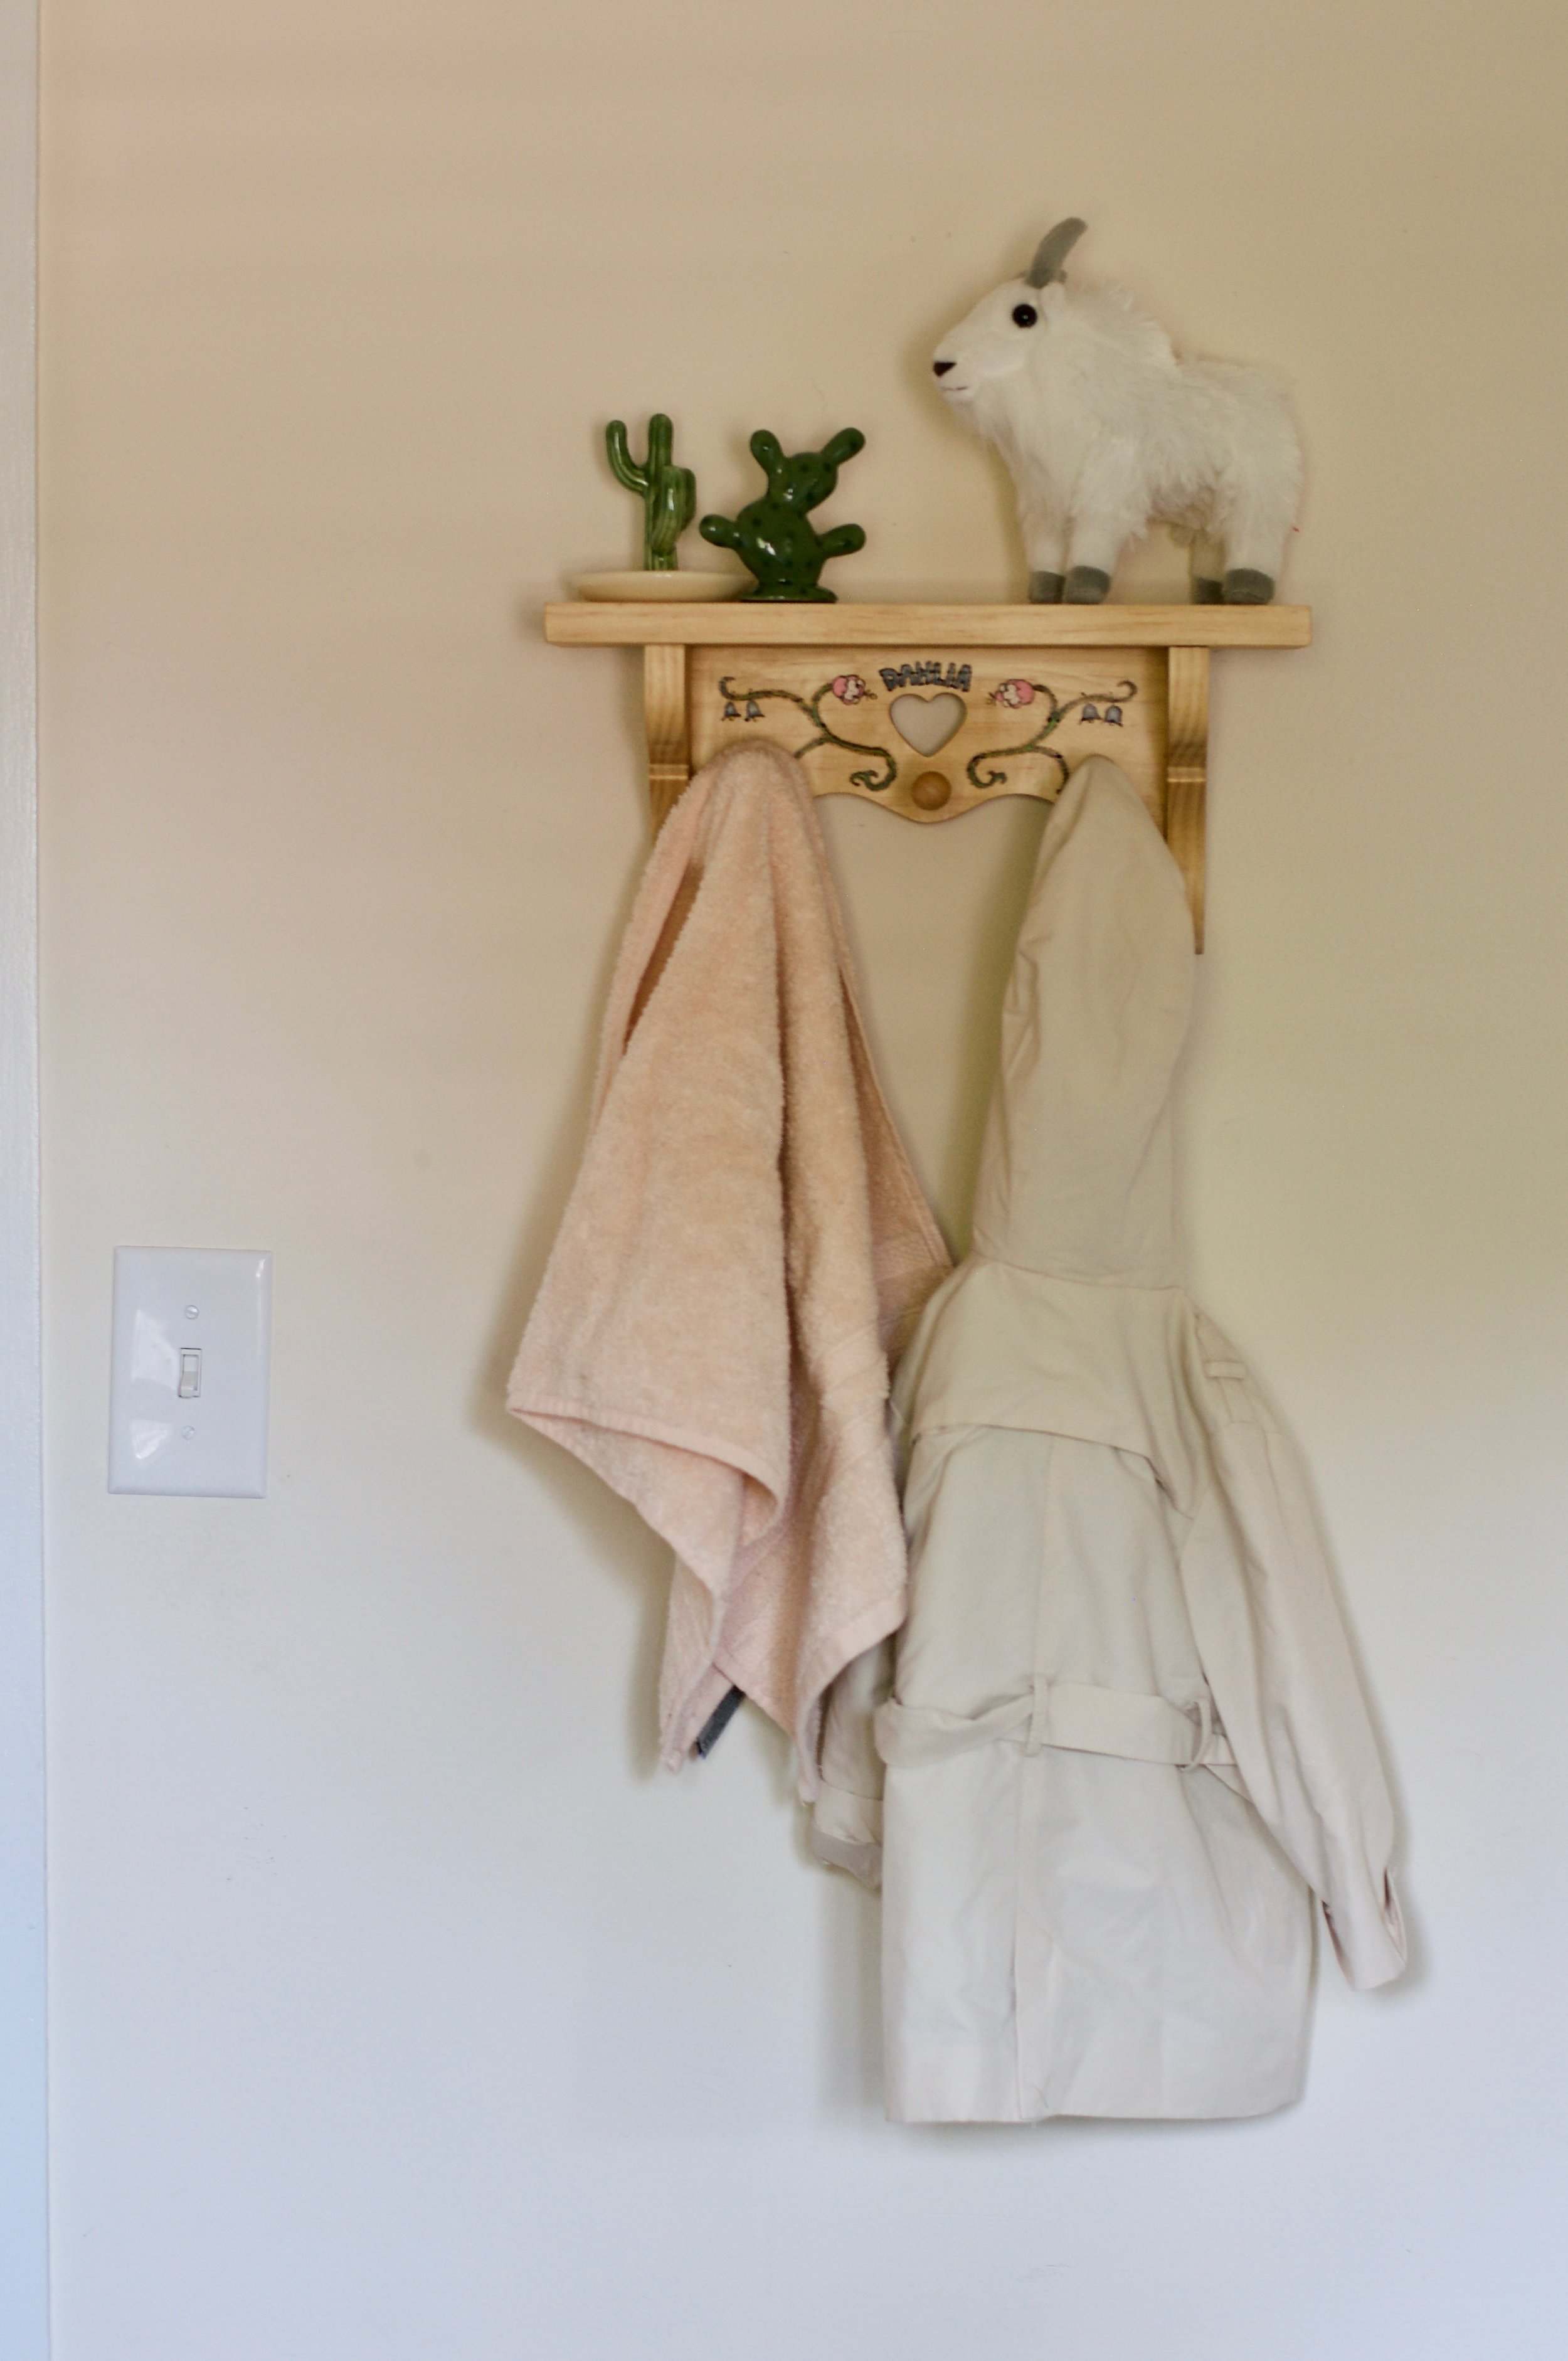
And that’s it! I am so proud of how it came out and hope it is something our little girl will treasure forever, as I have the shelf my aunt gave to me. What have you done to personalize your child’s room?